Luminar Neo has evolved from an innovative but somewhat flawed photo-editing application into one of the most capable, feature-rich, and cost-effective photo studios on the market today. However, some find Neo’s performance inconsistent, and some features feel less mature than others. Nonetheless, Luminar Neo is a top-tier product capable of demolishing its more expensive rivals. Jump to Conclusion | Try Luminar Neo – For Free
LUMINAR NEO REVIEW CONTINUES BELOW
GET LUMINAR NEO
ON SALE – WAS $119
US$79
SAVE 10% WITH PROMO CODE SP10NEO
Table of Contents
- What is Luminar Neo
- How much does Luminar Neo cost
- Luminar Neo Free Trial
- Photo Management in Luminar Neo
- Editing Photos in Luminar Neo
- Enhancing and Restoring Photos
- What’s Luminar Neo like to use
- What is missing in Luminar Neo
- Is Luminar Neo any good?
- Alternatives to Luminar Neo
- Conclusion
- About the Author
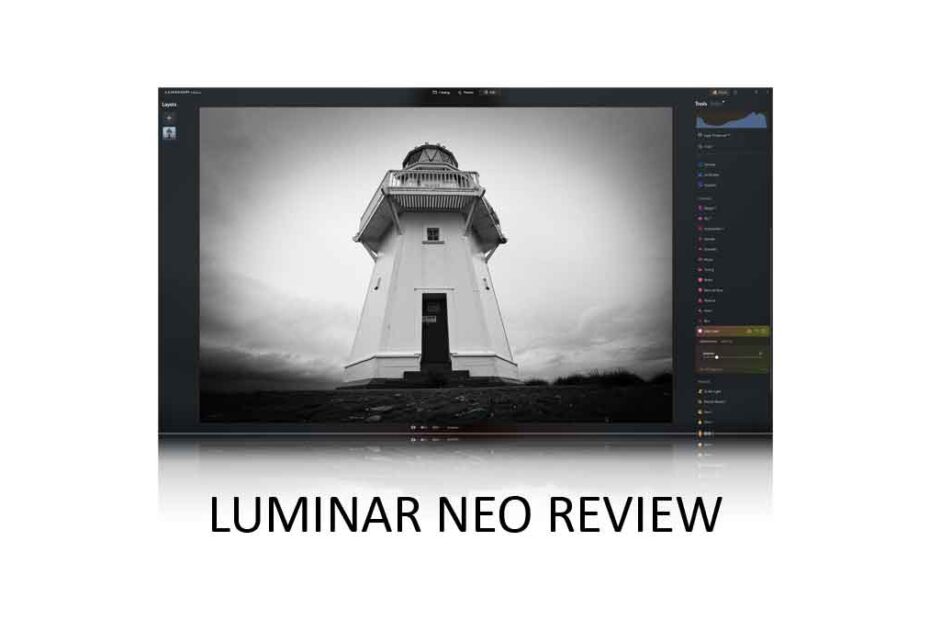
What is Luminar Neo
Luminar Neo is an AI-powered photo studio for Windows and macOS that combines photo management, non-destructive editing, and restorative image enhancement. You can buy Luminar Neo outright for a one-time payment – no subscription required. However, you may prefer to pay a little more for the perpetual cross-device license, which also includes Luminar Neo Mobile for iOS and Android.

Luminar Neo is often described as an effects-oriented photo editing application. This means Neo supplements traditional adjustments such as White Balance, Tone Curves, and Split Tones with straight-to-the-point effects such as Foliage Enhancer, Demist, and Golden Hour Glow. As a result, you don’t need to know much about photo editing to edit photos. For this reason, Luminar Neo is an excellent choice for beginners and anyone looking for fast results.
Yet none of this is to say that Luminar Neo is dumbed down. On the contrary, Neo also includes the usual adjustments, and even the most capable photo-editing experts will find Neo’s box of super-tricks hard to resist.
These tricks include Sky Replacement, Portrait Bokeh AI background blur, Face AI, and Magic Light AI. Neo also utilizes generative AI. With GenSwap, you can add new elements to your photo or use GenErase to delete unwanted objects. You can even expand your photo’s content with GenExpand and breathe new life into vintage photos with the Restoration tool. Neo is also equipped with Noisless AI, SuperSharp, and Upscale AI – designed to denoise, deblur, and enlarge your photos.
Furthermore, Luminar now has a very respectable photo management feature set. You can use the free Luminar Share app to transfer photos between your computer and smartphone, and the new Spaces feature allows you to publish your photos on the web without the burden of a cloud subscription.
How much does Luminar Neo cost
A single Luminar Neo lifetime license costs a one-time payment of US$119. Alternatively, you can buy one of the cross-platform bundles. These start from $159 and include both the desktop version of Luminar Neo and Luminar Mobile for iOS and Android. Meanwhile, the $179 Ecosystem pass gives you all of the above plus access to Spaces.
It’s worth noting that Luminar Neo is no longer available to new customers via subscription. Furthermore, the once-premium Luminar Extension Pack and Creative Journey Pass have been discontinued and are now included with the base product.
Luminar Neo Free Trial
You can try Luminar Neo for 14 days free of charge. No payment or credit card is required. Try Luminar Neo Now – Free.
Photo Management in Luminar Neo
Photo management in Luminar Neo has improved significantly in recent times. As usual, you can rate your photos, flag them as favorites or rejected, and assign multiple images to any number of albums. Meanwhile, you can use Neo’s quick filters to search for photos using parameters such as Capture Date, Rating, Camera Model, and even focal length. Moreover, you can set multiple parameters to further narrow your search.

Alternatively, you can specify explicit dates or shooting parameters using Smart Search. You can also use the Smart Search feature to find pictures featuring specific elements. For example, you can search your photo collection for all images containing ‘Birds’ or ‘Waterfalls’. Best of all, this is achieved through automated object recognition, so you don’t have to assign keywords manually.
There are multiple ways to export and share your photos. You can export them directly to your email or save them to disk using formats such as JPEG, PNG, Photoshop PSD, TIFF, PDF, JPEG 2000, and DNG. You can also trade photos between Luminar Neo and your smartphone using the free Luminar Share App for iOS and Android. To that end, Neo is compatible with Apple’s HEIC format.
But perhaps the most exciting addition to Neo is Spaces. Now you can upload your photos to the web, making them accessible to anyone with a web browser and the Space’s unique URL. Not only is this a great way to share photos with family, friends, and clients, but it’s also subscription-free when you buy the Luminar Neo Ecosystem license. Feel free to visit my example Space ‘Birds’. Visit Now
However, Luminar Neo lacks some notable photo-management features. For instance, alternatives such as Lightroom, ACDSee, and Mylio Photos all feature Face Recognition. I’d also like to assign keywords to my photos. Nonetheless, the inclusion of Quick Filters, Smart Search, Luminar Share, and Spaces makes Luminar Neo an extremely competent photo management tool
Editing Photos in Luminar Neo
Luminar Neo’s generous selection of presets and effects-oriented tools makes it one of the most accessible photo editing applications on the market. Yet enthusiasts are likely to be equally charmed by Neo’s huge and innovative feature set.
Beginners or anyone in a rush may begin with Luminar Neo’s well-presented Preset mode. Neo features 22 different Preset Collections, each containing five to six individual Presets. Each preset collection is oriented toward a specific style, such as Urban, Landscape, Filmatic, and Portrait. Furthermore, Luminar Neo will analyze your photo and recommend the Preset collection that best suits it.

Meanwhile, enthusiasts may prefer to head over to the Develop tab. Here, you can find all the traditional adjustments, such as White Balance and Tone Curves, but others may find Enhance AI’s Accent AI and Sky Enhancer adjustments just as good and a fair bit quicker.
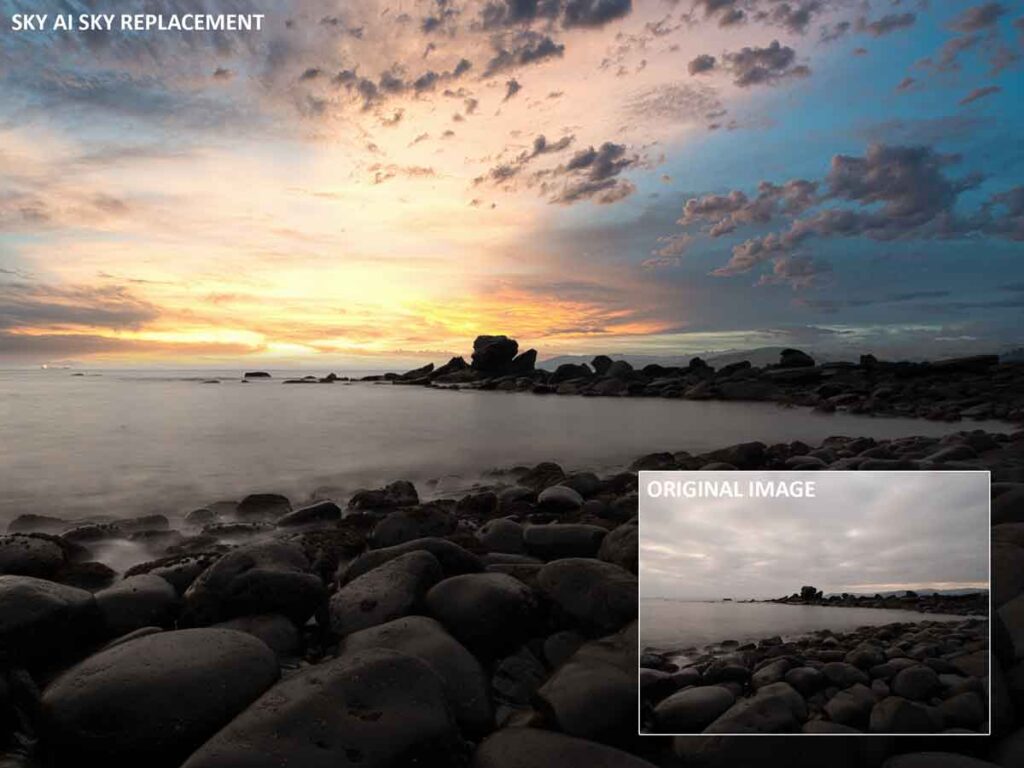
Neo’s Editing tab is divided into six separate categories. The Essentials tab is standard fare, featuring tools for adjusting exposure and contrast, applying black-and-white conversions, and sharpening. In contrast, the Landscape tab includes advanced landscape-centric features such as the excellent Sky AI sky-replacement tool, Twilight Enhancer, Golden Hour Glow, and more. In the portrait section, you’ll find tools to blur your subject’s background, add virtual studio lights, smooth skin, whiten eyes, remove dark circles, and even slim waists.
Critically, all of these well-named tools are largely automated, and, when combined, can turn a typical selfie into a pro-like portrait or a dreary landscape shot into a sunset masterpiece. While you may consider such features artificial, they can be used with restraint to gently correct and complement an otherwise good out-of-camera image.
Neo also includes some practical tools. For instance, there’s HDR, Focus Stacking, Panorama stitching, background removal, and you can use layers to add effects or blend multiple images. There’s a Dodge and Burn tool, a Clone Brush, and Color Transfer – a neat tool that transfers the color profile of one image to another. The Light Depth feature is particularly useful for correcting back-lit portraits, and GenErase is one of the better AI Erase tools I have tested. There are some duds, however. With GenSwap, you can replace elements of your photo with hyper-unrealistic AI alternatives, while GenExpand is unlikely to expand your photo’s scenery with a reliable degree of realism.
Quite frankly, there are just too many features to review. Moreover, many of these features are unique to Neo, so we lack a point of comparison. It’s also true that their worth really depends on the nature of your photography and what you are trying to achieve. But, all that being said, it’s difficult to imagine anyone not getting their money’s worth from Luminar Neo. Try Luminar Neo Free.
Enhancing and Restoring Photos
Neo’s AI-powered feature set is equipped to denoise, deblur, upscale, and restore images. Regarding noise reduction, Noiseless AI is superior to traditional methods but falls short of top-tier alternatives such as DxO PureRaw, ON1 NoNoise AI, and even Lightroom‘s own AI Denoise.

In contrast, SuperSharp is quite capable of correcting slightly mis-focused or motion-blurred images, but again, not quite to the level of its competition, and it’s much the same story with Upscale AI – Neo’s AI-powered photo enlarger. However, the Restoration feature is very impressive and can repair and colorize vintage photos to a high degree, though it tends to apply Sepia tones more often than I’d like.
Overall, image enhancement in Luminar Neo is average. However, when factoring in the price of top-tier alternatives such as Gigapixel, Topaz Photo AI, or DxO PureRaw, the inclusion of these features into Luminar Neo begins to feel very generous indeed.
What’s Luminar Neo like to use
Luminar Neo’s generous supply of presets and effects-oriented features effectively flattens the photo-editing learning curve, making Neo my de facto recommendation as the best photo-editing application for beginners and anyone in a rush.
Moreover, the interface is attractive, well-presented, and responsive for the most part. Many of its features and adjustments include tooltips that describe their functions, and you can stack your most-used adjustments and presets into favorite lists. Meanwhile, the built-in step-by-step tutorial is truly excellent, and there’s even an AI assistant on hand to answer your questions and apply your edits on request.

Unfortunately, Luminar Neo is quite heavy to run, and some computers will struggle more than others. In my case, Neo has always run well, and I had to create unrealistically heavy edits to replicate the poor performance reported by some of my audience. Nonetheless, I recommend you try Luminar Neo on your own hardware before making your purchase. Try Luminar Neo – Free.
What is missing in Luminar Neo
Luminar Neo is missing very little when it comes to photo editing. However, manually assigned keywords, face recognition, and a map view for geotagging remain absent from Neo’s photo management feature set. While Neo features AI-powered noise reduction, I’d welcome an improved version of Noiseless AI, as it currently stands out as a weak point. Otherwise, Luminar Neo is offering an awful lot for your money.
Is Luminar Neo any good?
Luminar Neo is generally excellent. It’s typically a pleasure to use and offers a range of innovative tools that are both practical and fun. Yet, with such a large feature set, it’s reasonable to expect that some functions work better than others.
For instance, Smart Search does a great job finding images featuring specified elements such as waterfalls, buildings, and birds. However, it will almost certainly return false positives and, weirdly, doesn’t react to search terms such as ‘Person’ or ‘People’. While it’s very easy to connect your computer with your phone’s Luminar Share app, it will frequently disconnect – particularly when your phone goes unused for a few seconds and returns to the lock screen. Fortunately, reconnecting is easy. But, still.
As you might expect, Luminar Neo was very quick to embrace generative AI at a time when it was truly awful. However, GenSwap and GenExpand still feel like first-generation products and are utterly obliterated by ChatGPT, Grok, and the rest. In contrast, GenErase appears to be better than ever, and Restoration can produce some truly excellent results.
But Luminar Neo’s array of older features (which other vendors still struggle to replicate), such as Studio Light, Sky AI, Portrait Bokeh AI, and Skin AI, work extremely well, which is good since these are the features many will use most.
Neo’s interface remains one of my favorites because it’s easy to navigate and visually pleasing. For me, it’s also very stable and responsive, and I appreciate being able to stack my most-used adjustments into a favorites list.
Alternatives to Luminar Neo
Lightroom is the most popular all-in-one photo studio. Not only is it a competent photo-editing tool, but its Face Recognition-powered photo management uses cloud storage to untether your photos from your computer and make them accessible to the Internet of Things.
Yet Lightroom comes nowhere near Luminar Neo’s huge photo-editing feature set, and as a subscription service including 1TB of cloud storage, it costs considerably more to run. Read Lightroom Review
ON1 Photo Raw is a compelling alternative. Like Luminar Neo, its feature rich and can be bought outright for a one-time payment. Moreover, ON1 Photo Raw’s versions of AI upscaling, sharpening, and noise reduction outperform Neo’s by a wide margin, and its effect layers offer a larger creative envelope. Yet, I prefer Luminar Neo’s photo management, and many will find Neo much easier to use than the somewhat unwelcoming Photo Raw. Read ON1 Photo Raw Review
Thus, ACDSee Professional serves as a fine middle ground. It offers a refined Lightroom-like experience with top-tier Face Recognition-powered photo management but without the burden of a subscription. However, like all these alternatives, ACDSee lacks Luminar Neo’s dedication to ease of use and comes nowhere near Neo’s roster of innovative, effects-oriented adjustments. Read ACDSee Professional Review
Article Continues Below
Get Discounts on Photo Editing Software
Subscribe to my weekly newsletter and be notified of deals and discounts on photography software from ON1, Adobe, Luminar, and more. Spam Promise: Just one email a week, and there’s an unsubscribe link on every email.
Conclusion
Luminar Neo’s well-designed interface and wide range of sensibly named, effects-oriented features make it one of the best photo-editing applications for beginners. Yet, even if you are a seasoned photo editor, there’s a lot to like about Luminar Neo.
Specifically, Neo automates many of the most tedious tasks in photo editing. If you want to perform a significant edit, such as replacing the Sky or blurring the background, you only need to click a button or drag a slider. Once you get used to Luminar Neo, you may find it challenging to return to traditional photo editing workflows.
Photo Management has been greatly improved in Neo. The well-implemented Quick Filter feature makes sorting large collections a breeze, while Smart Search makes finding images with specific elements even easier. Luminar Share works well despite frequent disconnections, and the Spaces feature lets you share your photos with anyone with a web browser.
However, it is fair to say that Neo still has a few rough edges. For instance, Noiseless AI remains uncompetitive, and GenSwap and GenExpand feel unfinished. Yet, as a result of Neo’s constant development, that’s about it. Almost.
Performance remains questionable. Some users, including myself, have been happy with Luminar Neo’s speed and responsiveness since its earliest iterations. Yet some of my audience continue to experience insufferable lag and even crashing – despite reporting to use well-specified hardware. I have managed to replicate some of these issues, but only on earlier versions when applying an unrealistic amount of heavy edits. Yet, thanks to the free trial, you can always find out for yourself.
Overall, I really like Luminar Neo and consider it to be one of the best photo editing applications on the market and the default choice for anyone who prioritizes ease and fast results over process. Try Luminar Neo now – for Free | Go back to the Introduction.
Subscribe to my weekly newsletter to be notified of any deals and discounts on Luminar Neo and other Photography Software and gear. Subscribe Now.
GET LUMINAR NEO
ON SALE – WAS $119
US$79
SAVE 10% WITH PROMO CODE SP10NEO
Luminar Neo is more affordable, easier to use, and feature-rich than Lightroom. However, Lightroom offers better photo management, includes 1TB of cloud storage, and lets you access your collection on a wide range of devices. https://youtu.be/pwfW4ICXPII
Luminar Neo is excellent for beginners thanks to its well-presented interface, generous supply of presets, and a wide range of compound effects such as golden hour glow, foliage enhancer, and sky replacement
The Luminar Neo extension pack has been discontinued as a separate add-on and is now included in the base version of Luminar Neo. Features included Supersharp, Noiseless AI, Upscale AI, HDR Merge, Focus Stacking, and the Panorama stitching tool.
Yes. You can buy Luminar Neo for MacOS and Windows for a one-time payment of US$119
No. Luminar Neo’s subscription packages have all been discontinued and replaced with one-time payment lifetime licenses.
The Luminar Neo Creative Journey pass has been discontinued as a separate add-on and is now included in the base version of Luminar Neo. Features included Studio Light, Water Enhancer, GenSwap, GenErase, and GenExpand.
About the Author

Related Reading

Best Photo Editing Software 2026

Best Noise Reduction Software 2026

Best Alternatives to Lightroom 2025

Best AI Upscaler for Photography 2025