In this post, we’re looking at noise in photography, what causes photo noise, and the steps you can take to avoid taking noisy photos.
Furthermore, if the damage is already done, I’ll point you toward the best photo noise reduction applications you can buy today. Jump to Conclusion.
Table of Contents
- What is Digital Noise in Photography
- What causes noise in photography
- Types of Noise in Photography
- ISO and Noise in Photography
- How to avoid photo noise
- How to remove noise from photos.
- Conclusion
What is Digital Noise in Photography
Photographic Noise is caused by random corruption of your camera’s digital imaging signal, resulting in a grain-like texture that varies in severity depending on your camera model and shooting conditions.
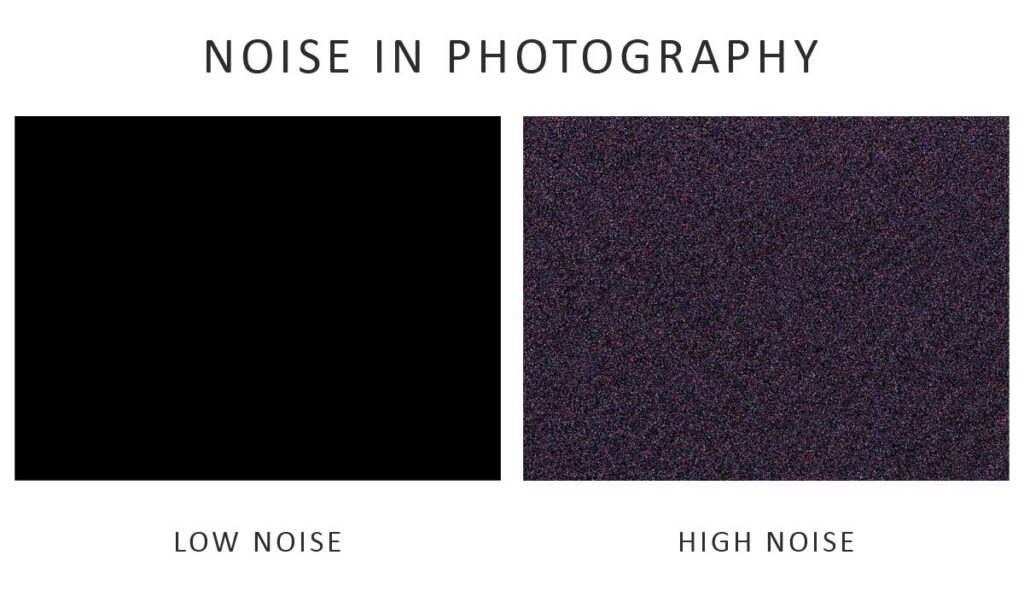
In ideal conditions, noise is present but effectively invisible. In other cases, you may see a small amount of photo noise, but it may appear attractive and film-like. But at its worst, photo noise can completely corrupt your photo by introducing strange colors and detail obscuring grain.
What causes noise in photography
Broadly speaking, three factors cause noise in photography. These factors are Random noise, Banding Noise, and Fixed Pattern Noise.
Random Noise in Photography
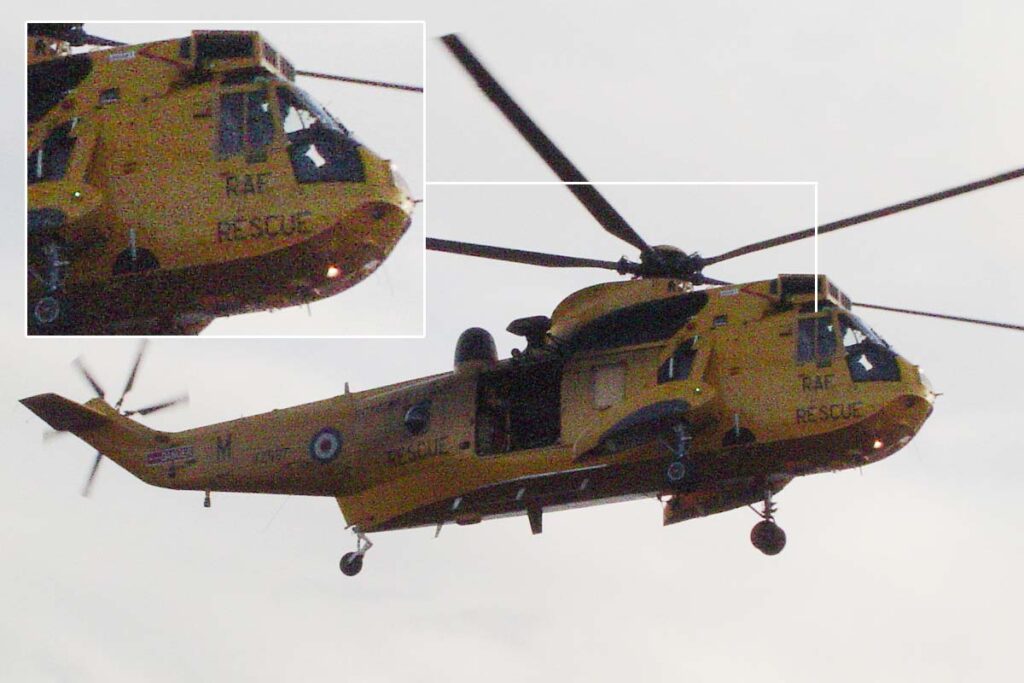
Random noise is due to random fluctuations in the digital image signal. In a perfect world, each pixel would precisely represent the brightness of the scene you photograph. However, electronic fluctuations cause some pixels to brighten or darken, resulting in the grain we’re all familiar with.
Random noise is tricky because, as the name suggests, the grain pattern is never the same. Furthermore, the severity of random noise varies depending on your camera’s ISO. Specifically, the higher your camera’s ISO, the greater the amount of random noise.
You can remove random noise using noise reduction software. But since the noise is integrated with the image, some noise reduction applications also strip detail. Read Best Noise Reduction Software Applications.
Banding Noise
The camera’s circuitry causes Banding Noise. As you can imagine, converting a series of voltages to a photograph of your cat takes a lot of processing, with each step likely to introduce some degree of noise. As with Random Noise, Banding Noise becomes more visible at higher ISOs and is difficult to remove.
Fixed Pattern Noise
Fixed pattern noise is caused by imperfect pixels and exacerbated with heat. As a result, Fixed Pattern Noise is more likely to occur during long-exposure photography.
But, as the name suggests, fixed pattern noise is fixed, thus, predictable. As a result, fixed pattern noise can be anticipated, mapped, and reliably removed with in-camera software.
Types of Noise in Photography
There are two types of noise in photography: Luminance and Chroma noise.
Luminance Noise
Luminance Noise is the random darkening or brightening of individual pixels resulting in film-like grain, which you may find attractive. At high ISOs, Luminance Noise becomes more severe and destructive.
Chroma Noise
Chroma Noise, or color noise, makes individual pixels shift to a different incorrect color. Unlike Luminance Noise, you’re more likely to find Chroma Noise destructive than attractive, and it’s more difficult to remove. Like Luminance noise, Chromo Noise becomes more severe and destructive at higher ISOs.

ISO and Noise in Photography
In practical terms, ISO enables you to capture a sufficiently bright photo with insufficient light. In other words, high ISOs amplify your photo’s brightness. However, using a high ISO will also amplify photo noise. Read What is ISO in Photography.
For instance, most cameras produce optimal results at ISO100. But as you increase your camera’s ISO, your photo will become progressively noisier.
But how noisy depends on your camera’s sensor. Because large sensors capture more light than smaller sensors, large sensors are less noisy at high ISOs than smaller sensors.
Either way, we must use ISO strategically and never use an ISO higher than necessary. Instead, we must get as much light as possible using suitable equipment, appropriate shutter speeds, and apertures.
How to avoid photo noise
To avoid photo noise, we must use the lowest possible ISO. And to avoid high ISOs, we must maximize the amount of light our camera’s sensor receives. There are 4 ways to do this.
1. Take Photos in Better Light
The most obvious way to avoid noise is photos is to take photos in well-lit environments. For example, reserve taking your photo until mid-day, when you’re outside or near a window. Alternatively, you can bring your own lighting and shoot using a flash.
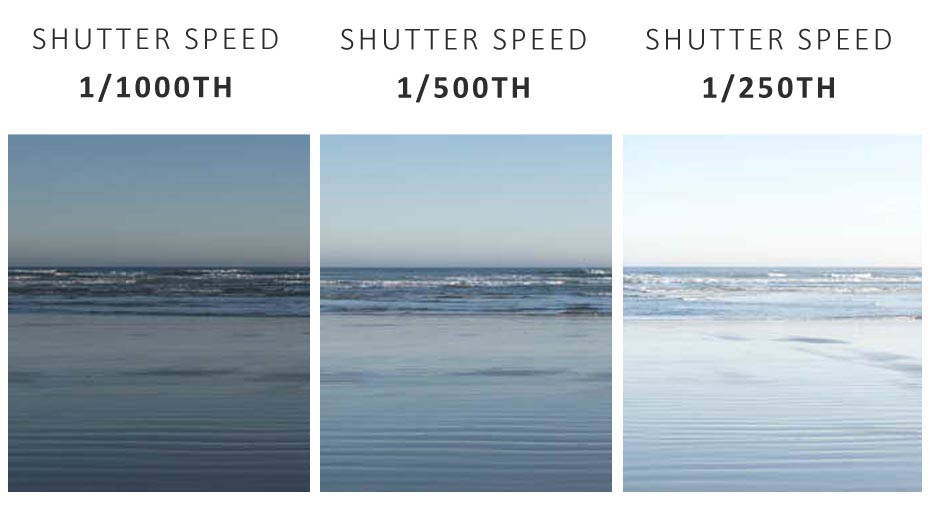
2. Use a Slower Shutter Speed
Capture more light and reduce photographic noise by reducing your shutter speed. For instance, reducing your shutter speed from 1/1000th to 1/500th of a second doubles the time your camera’s sensor is exposed to the light, thus, doubling your photo’s brightness and halving photo noise. To access really slow shutter speeds, consider using a tripod. Read What is Shutter Speed in Photography.
3. Use a large aperture lens
The aperture of your lens determines how much light your lens can pass to your camera’s sensor at any given moment,
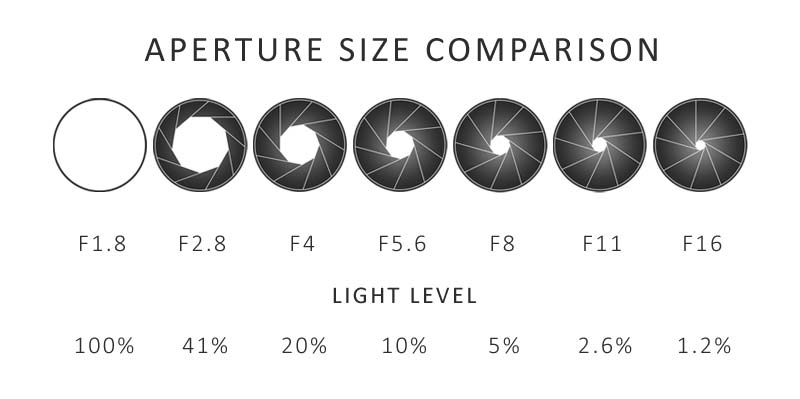
For instance, a lens with a large F2 aperture will flood your camera’s sensor with four times as much light as a lens with an F4 aperture resulting in a brighter image and less photo noise. A large aperture lens is ideal when it becomes impractical to use slow shutter speeds. Read What is Aperture in Photography.
4. Use a camera with a larger sensor.
Larger sensors capture more light like a wider bucket catches more rainwater than a narrow bucket. And more light equals less photo noise.
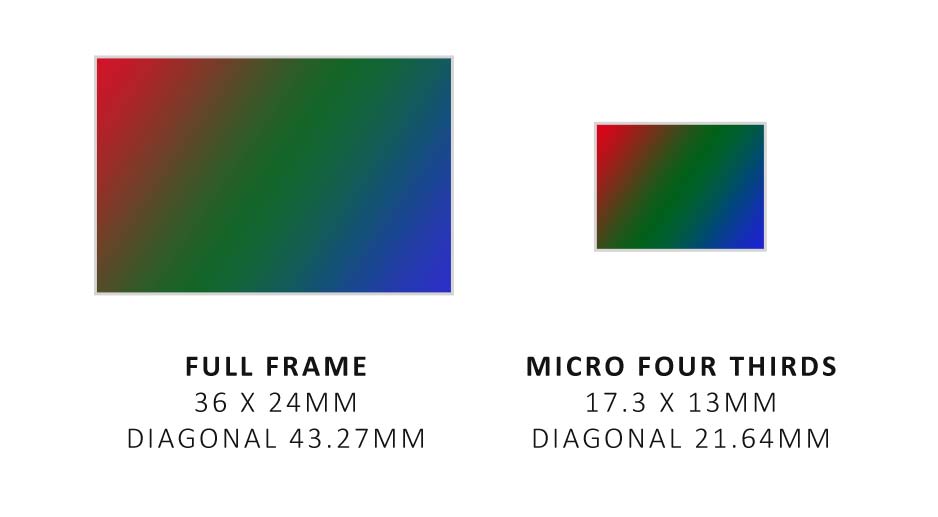
For instance, a full-frame sensor has four times the surface area of a Micro Four Third sensor, capturing four times as much light. As a result, you can amplify a full-frame camera’s image four-fold (ISO400) and still end up with an image comparable to the best possible Micro Four Thirds image. Read Camera Sensor Sizes Compared.
How to remove noise from photos.
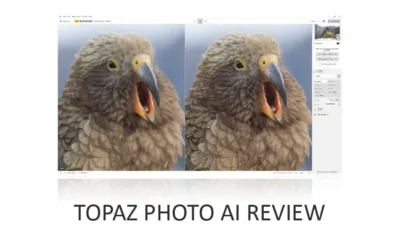
You can remove photo noise using noise reduction software. Historically, noise reduction removed photo noise and detail and, as a cure, was sometimes worse than the disease.
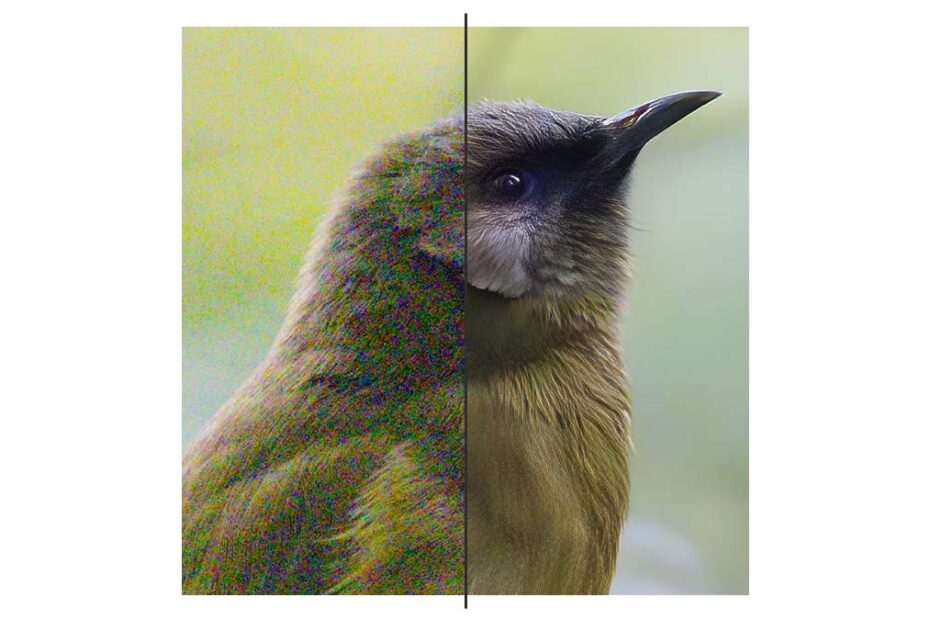
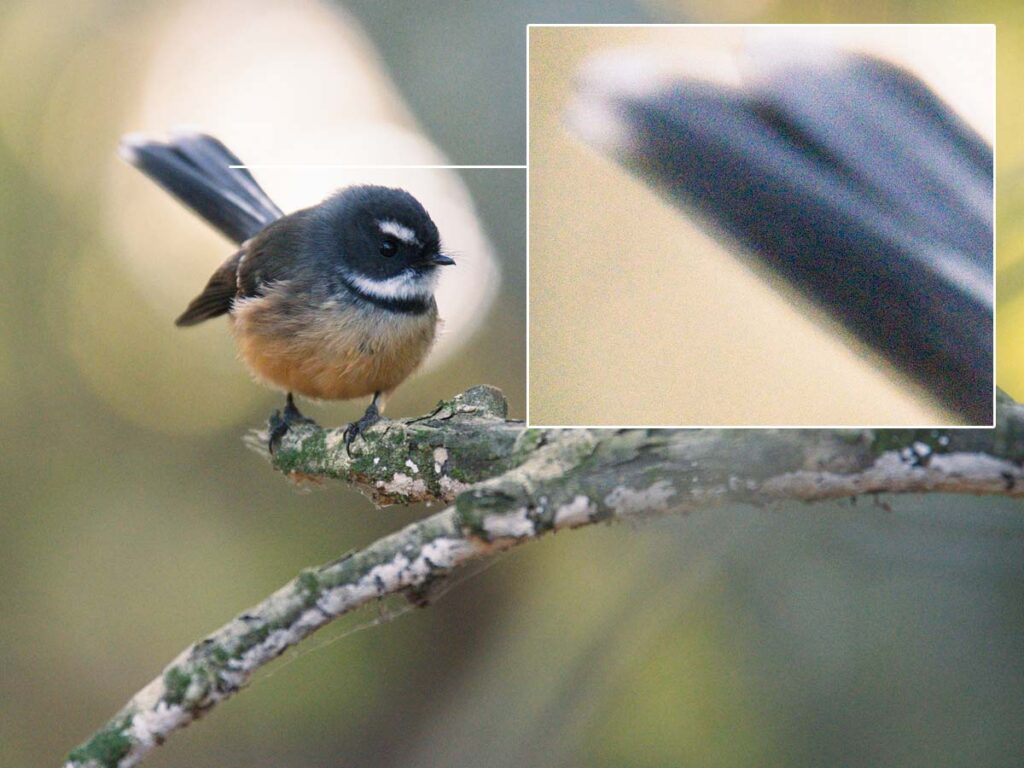
But the latest AI noise reduction applications are extremely impressive, as shown in the example below.
Read Best noise reduction software applications for more information.
Article Continues Below
Get Discounts on Photo Editing Software
Subscribe to my weekly newsletter and be notified of deals and discounts on photography software from ON1, Adobe, Luminar, and more. Spam Promise: Just one email a week, and there’s an unsubscribe link on every email.
Conclusion
Photo noise is ever present, but so long your camera gets enough light, photo noise will be negligible to invisible. However, if you’re shooting in poor light and must use a higher ISO to produce a sufficiently bright photo, your camera will amplify your photo’s brightness and noise in equal measure.
Thus, to avoid taking noisy photos, you must ensure your sensor gets all the light it needs by taking pictures in good light and with a suitably slow shutter speed. And if neither is practical, you can increase your camera’s light intake using large aperture lenses or choose a camera with a larger sensor.
But suppose the damage is done, and you have a noisy photo to fix. In that case, the best noise reduction software applications can perform miracles and are vastly more affordable than a camera or lens upgrade.
Subscribe to my weekly newsletter and receive deals and discounts on photography software and gear. Subscribe Now.