Stops in photography are used to describe an increase or decrease in exposure. For example, increasing your exposure by 1 stop means doubling your exposure, thus doubling your photo’s brightness. In contrast, reducing your exposure by 1 stop will half your exposure and half your photo’s brightness.
You can add or reduce a stop by increasing or decreasing your aperture, shutter speed, or ISO. Alternatively, you might reduce or gain a stop by adjusting any combination of all three. Understanding Stops in photography is hugely beneficial, particularly if you want to use exposure compensation or ND filters. Jump to Conclusion.
Table of Contents
- What is a Stop in Photography
- Multiple Stops explained
- Why Light Stops are Useful
- Whats F Stop
- Shutter Speed Stop
- Whats ISO Stop
- Conclusion
What is a Stop in Photography
A stop of light is a convenient way for photographers to discuss adjusting an exposure. For instance, you might want to brighten your photo by 2 stops of exposure or reduce your exposure by 3 stops.
Adding a single stop refers to doubling your existing exposure. For example, you could double your shutter speed from 1 to 2 seconds for a 1 stop increase in light and a twice-as-bright photo.
Alternatively, you could reduce your exposure by 1 stop by halving your shutter speed to half a second for a half-as-bright photo.
Also, it is common to work in one-third and half stops. This is particularly true when using your camera’s exposure compensation mode.
Working with Multiple Stops
In reality, you will be adjusting your exposure not just by one stop, but by 2 stops, 3 stops, etc. However, increasing your exposure by 3 stops does not mean a 3-fold increase in exposure.
Instead, you are doubling your exposure 3 times. Therefore, one second becomes an 8-second exposure.
| Stops | New Shutter Speed (based on 1 second shutter speed) |
|---|---|
| – 3 stops | 1/8 second |
| – 2 stops | 1/4 second |
| – 1 stop | 1/2 second |
| 0 stops | 1 second |
| + 1 stops | 2 seconds |
| + 2 stops | 4 seconds |
| +3 stops | 8 seconds |
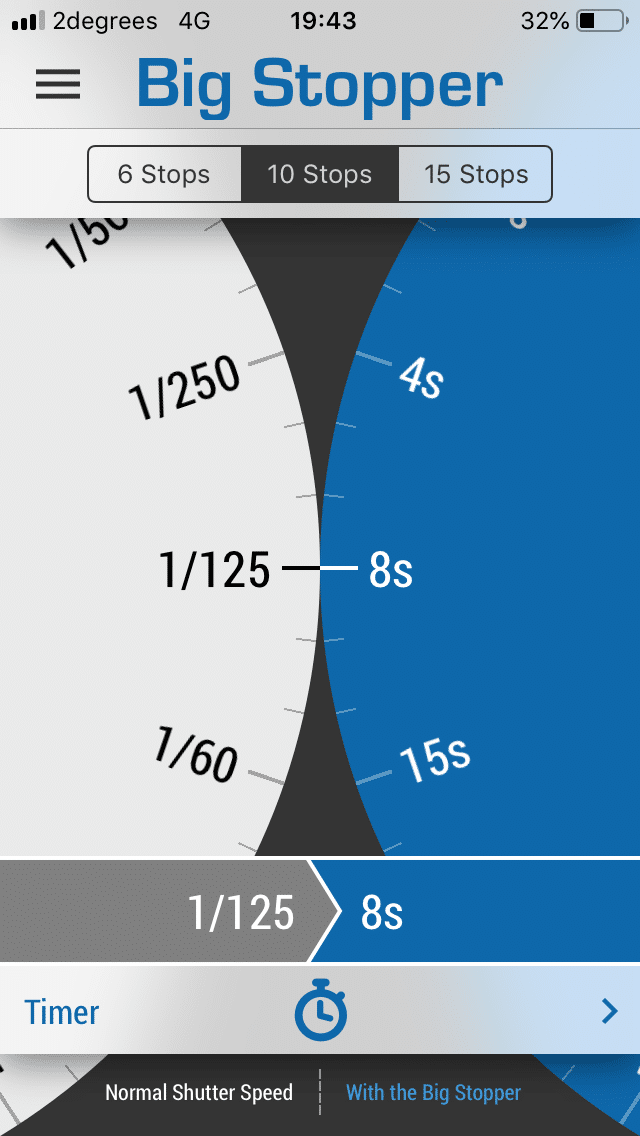
As you can imagine, it does not take one long to lose the plot, especially if you are trying to work out a 10 stop increment on 1/125th of a second (8 seconds).
Fortunately, you can download free exposure calculators that will do the work for you. Phew.
Why light stops are useful for exposure
Light stops are the main unit of your camera’s exposure compensation. For example, you might set your camera to automatically under or overexpose by 1 stop.
Additionally, ND filters are sold based on whether they block 3 stops, 6 stops, or 10 stops worth of light. Thus, understanding light stops are essential for gauging correct exposure.

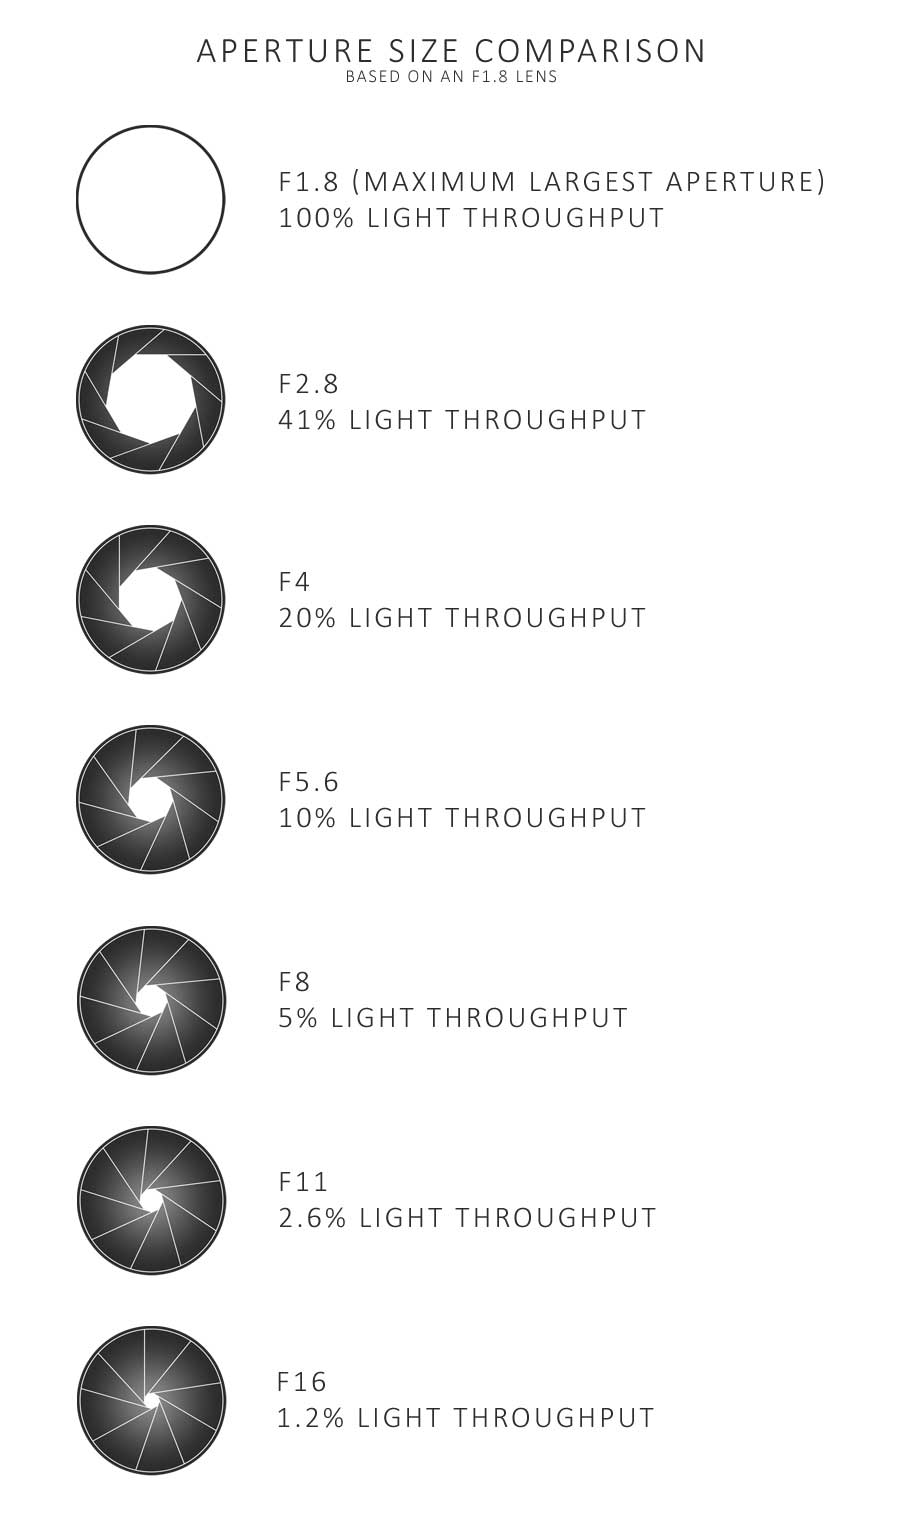
Whats an F stop in Photography
F stops in photography refer to the size of your aperture. For instance, your aperture may have an F stop of F1.8 or F5.6.
To gain one extra stop of light, you could move from F5.6 to a larger, brighter F4 aperture. Alternatively, you can reduce light by dropping a stop to F8. Learn all about Aperture
| Aperture | Stops | Brightness |
|---|---|---|
| F1.4 | +3 Stops | 800% |
| F2 | +2 Stops | 400% |
| F2.8 | +1 Stop | 200% |
| F4 | – 0 Stops | 100% |
| F5.6 | -1 Stop | 50% |
| F8 | -2 Stops | 25% |
| F11 | -3 Stops | 12% |
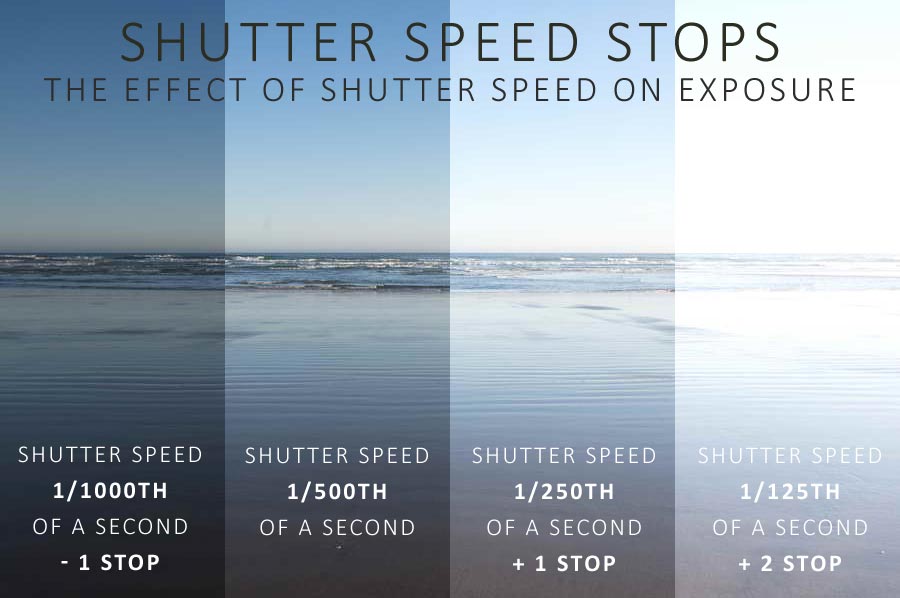
Shutter Speed Stops
Shutter speed stops are a little bit easier since we can all relate to time. If you have a shutter speed of 1/500th of a second, you can gain a stop of light by slowing your shutter speed to a twice-as-long 1/250th second.
Otherwise, half 1/500th to 1/1000th of a second to half your light and reduce your exposure by 1 stop.
To put it another way, if your shutter speed is half as long, your photo will be half as bright. Ultimate Guide to Shutter Speed
| Shutter Speed | Stops | Brightness |
|---|---|---|
| 1/400th Second | -3 Stops | 12% |
| 1/200th Second | -2 Stops | 25% |
| 1/100th Second | -1 Stop | 50% |
| 1/50th Second | 0 | 100% |
| 1/25th Second | +1 Stop | 200% |
| 1/12th Second | +2 Stop | 400% |
| 1/6th Second | +3 Stop | 800% |
ISO Stops in Photography
ISO is a little different from shutter speed and Aperture since it does not provide your camera’s sensor with any light. Instead, ISO artificially brightens your image by amplifying the signal or digital file (or both). As a result, it is equally valid to consider ISO in stops.
Most cameras have a base, or lowest, ISO of 100. Therefore, doubling your camera’s ISO to 200 is equivalent to an increase of 1 stop of brightness.
Whilst ISO can be handy and even essential, excessive use of ISO will ruin your photo. Ultimate Guide to ISO.
| ISO | Light Stops | Brightness |
|---|---|---|
| 100 | 0 | 100% |
| 200 | + 1 Stop | 200% |
| 400 | + 2 Stops | 400% |
| 800 | + 3 Stops | 800% |
| 1600 | + 4 Stops | 1600% |
| 3200 | + 5 Stops | 3200% |
| 6400 | + 6 Stops | 6400% |
Conclusion
Stops in photography are used to describe an increase or decrease in exposure. If you increase your exposure by one light stop, your photo will be twice as bright. Otherwise, you can reduce your exposure by 1 light stop for a photo half as bright.
Furthermore, you are likely to adjust your exposure by multiple stops. For example, a 3 stop increase in exposure means doubling the brightness of your photo three times.
An extra stop of brightness can be achieved by doubling either your shutter speed, aperture, or ISO. Alternatively, you can achieve an extra stop by making small adjustments to all three.
It is useful to understand what a light stop in photography is, particularly if you wish to use your camera’s exposure compensation setting or begin experimenting with ND filters and long exposures.