You can now create your own presets in Luminar Neo. Best of all, it’s really easy to do. But first, you need to update your copy of Luminar Neo to version 1.0.5 or later. If you would like to know more about Luminar Neo – read my full Luminar Neo review. Alternatively, you can buy or try Luminar Neo for free using the links below.
GET Luminar Neo TODAY
Luminar Neo Promo Codes
SP10NEO – SAVE 10%
SILENTPEAKNEO10 – SAVE $10
How to update Luminar Neo
You need to make sure you are using Luminar Neo version 1.0.5 or later. If you are not sure what version you are on, you can check and install updates by going to Help > Check for Updates
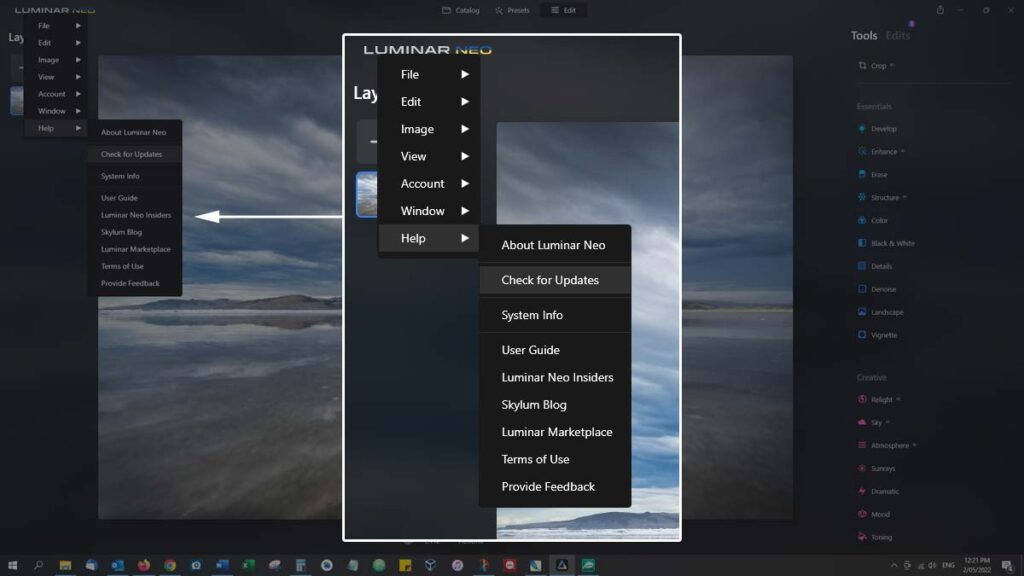
Updating Luminar Neo may take 15 to 20 minutes. You will not be able to use Luminar Neo during this time.
How to create presets in Luminar Neo
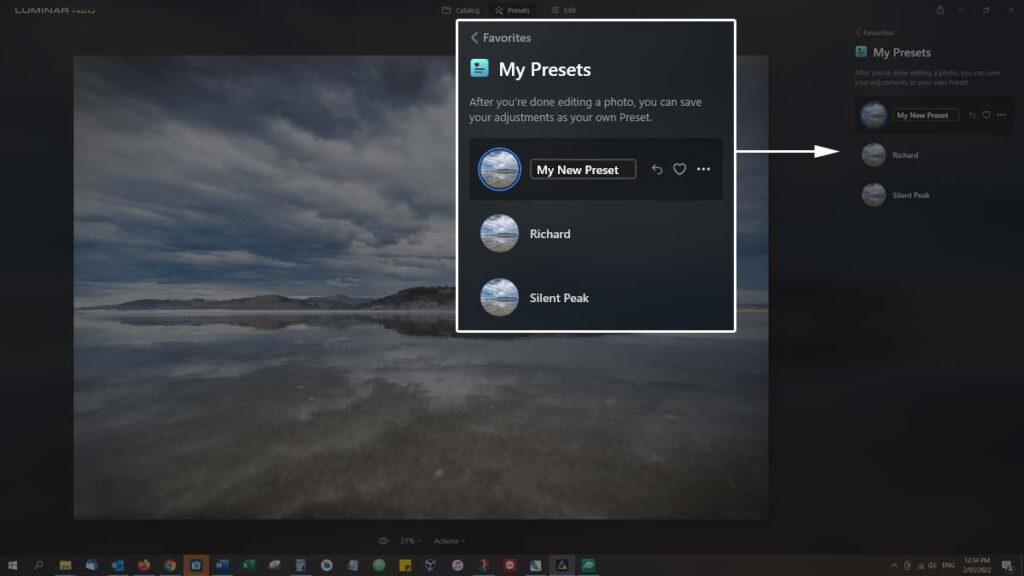
Using Luminar Neo v1.0.5 or later, begin by opening and editing a photo as usual. Once you’ve finished, click on the Actions menu at the bottom of the screen. You’ll be presented with the option to Save as Preset.
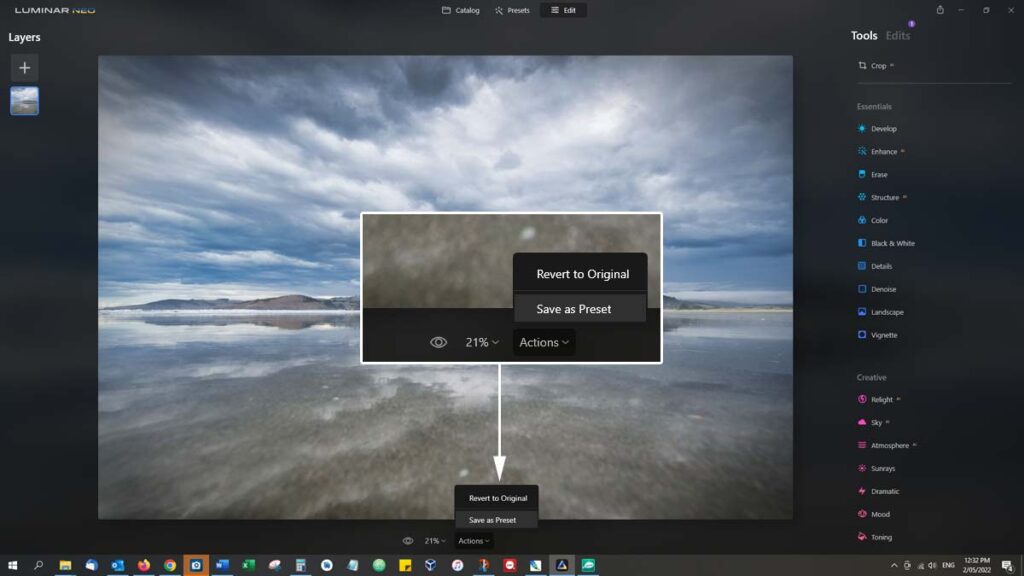
After which, you will name your Preset. Furthermore, by clicking on the heart icon, you can save your new Preset to your favorites list. This will make your new preset more accessible in the future. Alternatively, you can use this screen to edit, rename, and delete your other presets.